A healthy computer performs faster, remains stable, and experiences fewer crashes. If your system feels slow, overheats, freezes, or displays unexpected errors, it’s important to check its condition regularly. Learning how to check PC health Windows can help identify problems before they become serious.
Windows includes several built-in tools that allow users to monitor system performance, storage health, memory status, battery condition, and overall reliability. This guide explains the most effective methods to check your PC’s health and keep your system running smoothly.
Why You Should Check PC Health Regularly
Regularly monitoring your computer’s health is essential for maintaining reliable performance, preventing unexpected failures, and extending the lifespan of your hardware. Many system issues develop gradually, making routine health checks an effective way to detect problems before they become serious.
By checking your PC’s health on a regular basis, you can:
- Detect hardware problems before they lead to costly repairs or data loss.
- Monitor CPU, memory, and disk performance to identify bottlenecks.
- Identify storage issues early and protect important files.
- Improve overall system stability and responsiveness.
- Reduce the risk of crashes, freezes, and unexpected shutdowns.
- Extend the lifespan of critical hardware components.
- Ensure Windows operates at peak efficiency.
- Maintain better security by verifying that updates and protection features are functioning correctly.
Routine health checks can also help you determine whether performance issues are caused by software, hardware, or system configuration problems. For most users, performing a comprehensive PC health check once a month is a practical maintenance habit that helps keep both Windows 10 and Windows 11 systems running smoothly and efficiently.
Method 1: Use the Windows PC Health Check App
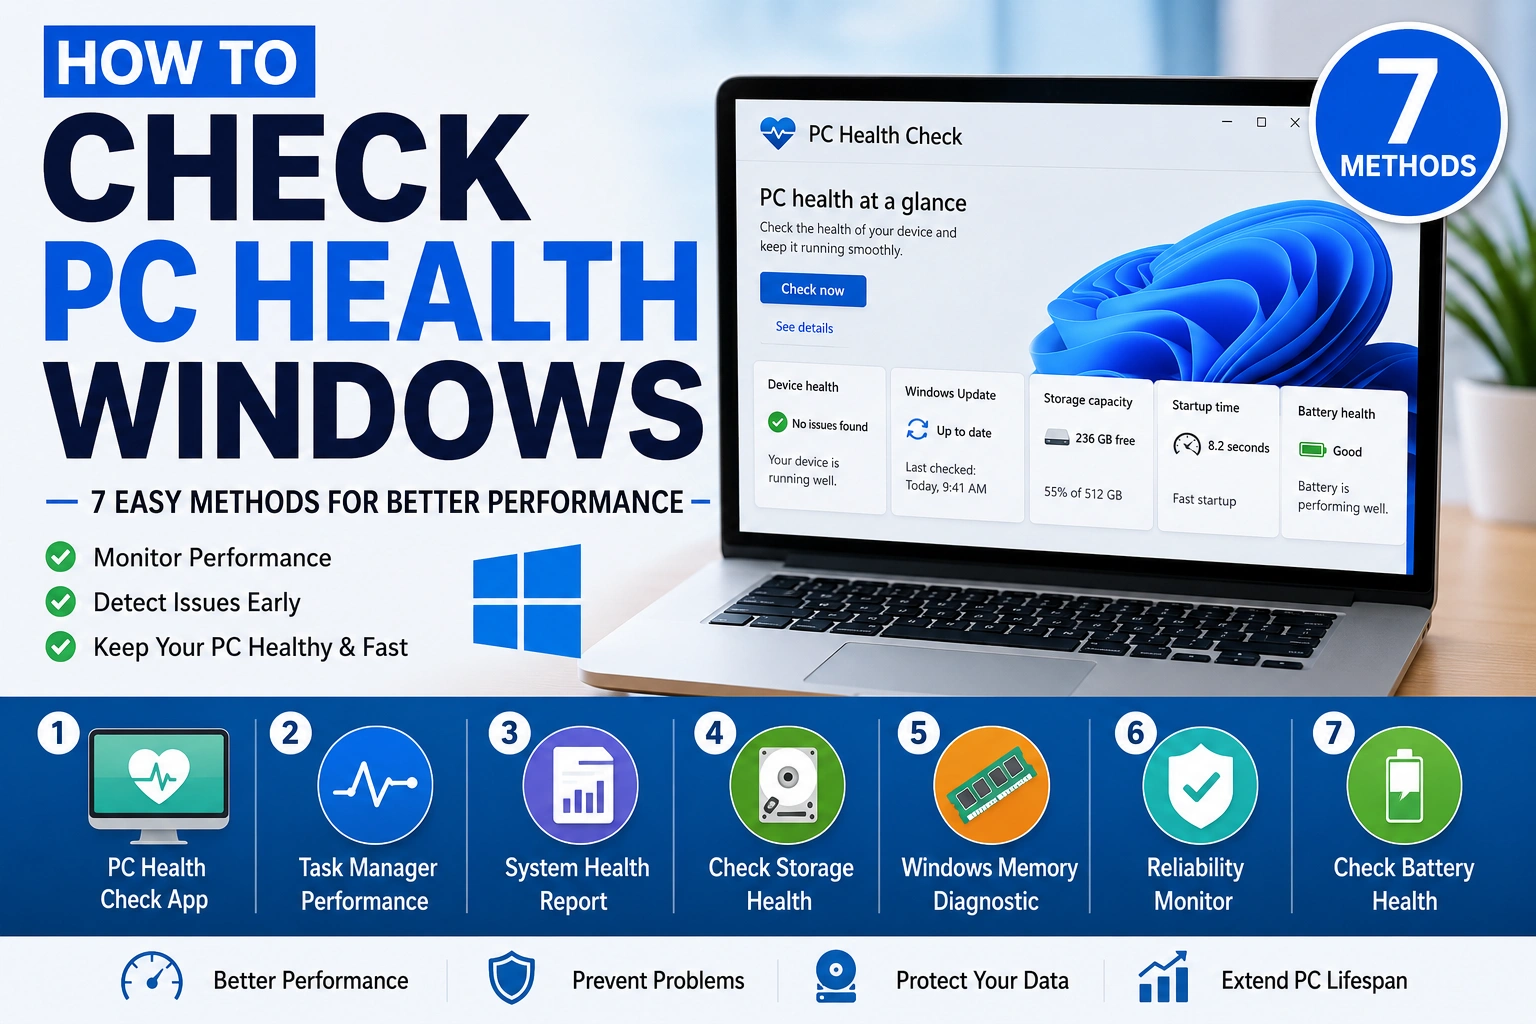
One of the simplest ways to check your computer’s overall condition is by using the Windows PC Health Check app. Developed by Microsoft, this free utility provides a quick overview of your system’s health and performance, helping you identify potential issues before they affect your computer.
The PC Health Check tool is particularly useful for users who want a fast and easy assessment without navigating through multiple Windows settings and diagnostic utilities.
Steps to Use the PC Health Check App
- Download the PC Health Check application from Microsoft’s official website.
- Install the application and launch it.
- Click the Check Now button.
- Wait a few moments while the tool analyzes your system.
- Review the health report and recommendations provided.
What Information Does the Tool Display?
The PC Health Check app provides insights into several important areas of your computer, including:
- Device health and overall system status
- Windows Update status and update availability
- Battery health and capacity information for laptops
- Startup performance and boot optimization
- Available storage capacity and disk usage
- Windows 11 compatibility requirements
- Backup and security recommendations
Benefits of Using PC Health Check
The tool is designed to help users quickly understand their computer’s condition without requiring advanced technical knowledge. It can identify performance concerns, alert you to missing updates, and provide recommendations for improving system reliability.
For most users, the Windows PC Health Check app is one of the easiest and fastest ways to check PC health in Windows and ensure the system is running efficiently.
Method 2: Check Performance Using Task Manager
Task Manager is one of the most useful built-in Windows tools for monitoring system performance in real time. It provides detailed information about how your computer’s hardware resources are being used, helping you identify performance bottlenecks and troubleshoot system slowdowns.
By reviewing the Performance tab, you can monitor CPU, memory, disk, and network activity to determine whether a particular component is causing issues.
Steps to Open Task Manager
- Press Ctrl + Shift + Esc on your keyboard.
- Click the Performance tab.
- Review the resource usage graphs and statistics displayed.
Check CPU Performance
The CPU section shows how much processing power your system is currently using.
Review the following information:
- Current CPU usage percentage
- Base processor speed
- Current operating speed
- Number of running processes
- Number of active threads
If CPU usage remains consistently high, it may indicate resource-intensive applications, background processes, malware, or software conflicts that require attention.
Monitor Memory Usage
The Memory section provides information about RAM utilization.
Check:
- Total installed RAM
- Available memory
- Memory usage percentage
- Memory speed
When memory usage is constantly near maximum capacity, your computer may become slow or unresponsive. Closing unnecessary applications or upgrading RAM can help improve performance.
Review Disk Activity
The Disk section displays how actively your storage drive is being used.
Monitor:
- Disk usage percentage
- Read speeds
- Write speeds
- Average response time
If disk usage frequently stays at 100%, it may indicate storage bottlenecks, background tasks, insufficient system resources, or drive health issues.
Analyze Network Activity
The Network section helps you monitor internet and local network usage.
Review:
- Current upload speeds
- Current download speeds
- Network utilization percentage
- Connection status
Unusual network activity may indicate large downloads, cloud synchronization processes, software updates, or potentially unwanted applications consuming bandwidth.
Why Use Task Manager for PC Health Checks?
Task Manager offers a quick and accurate overview of your system’s current performance without requiring additional software. Regularly monitoring resource usage can help you identify performance problems early, optimize system efficiency, and maintain a healthy Windows PC.
Method 3: Generate a Windows System Health Report
Windows includes a powerful but often overlooked diagnostic utility that can generate a detailed System Health Report. This built-in tool analyzes various aspects of your computer, including hardware performance, system resources, drivers, and operating system components.
The report provides valuable insights into potential issues affecting your PC’s performance and reliability, making it one of the most comprehensive tools available for checking PC health in Windows.
Steps to Generate a System Health Report
- Press Windows + R to open the Run dialog box.
- Type the following command:
perfmon /report
- Press Enter.
- Wait approximately 60 seconds while Windows collects diagnostic data.
- Review the generated report when the analysis is complete.
What Information Does the Report Include?
The System Health Report contains detailed information about several critical areas of your computer, including:
- CPU performance and processor diagnostics
- Memory usage and RAM diagnostics
- Disk performance and storage information
- Device driver status and potential driver issues
- Hardware configuration and performance metrics
- Software warnings and system alerts
- Network performance data
- Resource utilization statistics
- Operating system configuration details
Understanding the Results
After the scan completes, Windows highlights any detected warnings, errors, or performance concerns. These alerts can help you identify issues such as outdated drivers, hardware bottlenecks, excessive resource usage, or configuration problems that may impact system stability.
Pay close attention to sections marked with warnings or failures, as these often indicate areas that require troubleshooting or maintenance.
Benefits of Using the System Health Report
Unlike basic monitoring tools, the System Health Report provides a complete snapshot of your computer’s condition in a single location. It combines hardware diagnostics, performance monitoring, and system analysis into an easy-to-read report that can help both beginners and advanced users diagnose problems more effectively.
For users looking for a thorough assessment of their computer, the Windows System Health Report is one of the most powerful built-in tools available for monitoring overall PC health and performance.
Method 4: Check Storage Health
Your computer’s storage drive plays a critical role in overall system performance and reliability. Whether you use a traditional hard disk drive (HDD) or a solid-state drive (SSD), storage devices can develop problems over time due to wear, bad sectors, file system corruption, or hardware degradation.
Regularly checking storage health can help you detect potential issues early, prevent unexpected failures, and reduce the risk of data loss.
Check Storage Health Using Command Prompt
Windows includes a simple command that allows you to view the basic health status of installed storage drives.
Steps:
- Open Command Prompt as Administrator.
- Enter the following command:
wmic diskdrive get status
- Press Enter.
- Review the results displayed on the screen.
Understanding the Results
You may see one of the following status messages:
- OK – The drive is currently reporting no known hardware issues.
- Pred Fail – The drive has detected potential hardware problems and may be at risk of failure.
If the result shows Pred Fail, back up your important files immediately and consider replacing the drive as soon as possible.
Check for File System Errors
Windows also provides a built-in error-checking tool that scans the drive for file system issues and attempts to repair them automatically.
Steps:
- Open File Explorer.
- Right-click your system drive (usually C:).
- Select Properties.
- Open the Tools tab.
- Under Error Checking, click Check.
- Follow the on-screen instructions to begin the scan.
What the Error-Checking Tool Does
The utility can detect and repair:
- File system corruption
- Directory errors
- Invalid file entries
- Storage-related inconsistencies
- Minor disk issues affecting performance
Depending on the size of the drive and the number of files stored, the scan may take several minutes to complete.
Why Storage Health Matters
Storage failures often occur without obvious warning signs. Regular health checks help identify problems before they become critical, allowing you to protect important data and maintain system stability. Combining SMART status checks with Windows Error Checking provides a reliable way to monitor the condition of your storage devices.
For both Windows 10 and Windows 11 users, checking storage health regularly is an essential part of overall PC maintenance and long-term system reliability.
Method 5: Run Windows Memory Diagnostic
Random crashes, system freezes, application errors, and Blue Screen of Death (BSOD) messages are often linked to faulty memory modules. Windows includes a built-in Memory Diagnostic tool that can test your computer’s RAM for hardware-related issues and help determine whether memory problems are affecting system stability.
Running this diagnostic periodically is a good practice, especially if your PC is experiencing unusual behavior or performance problems.
Steps to Run Windows Memory Diagnostic
- Press Windows + R to open the Run dialog box.
- Type the following command:
mdsched.exe
- Press Enter.
- When prompted, select:
Restart now and check for problems (recommended)
- Your computer will restart automatically and begin the memory test.
- Wait for the diagnostic process to complete.
What Happens During the Test?
The Windows Memory Diagnostic tool scans your installed RAM modules for various types of memory errors, including:
- Faulty memory cells
- Data corruption issues
- Read and write errors
- Hardware-related memory failures
- Stability problems that may cause crashes or freezes
The test runs before Windows loads, allowing the tool to examine memory without interference from running applications.
Viewing the Results
After the scan is finished, Windows restarts normally. In many cases, the results are displayed automatically after logging in.
If the results do not appear, you can view them manually through Event Viewer:
- Open the Start menu.
- Search for Event Viewer.
- Navigate to:
Windows Logs > System
- Look for entries labeled MemoryDiagnostics-Results.
What to Do If Errors Are Found
If the diagnostic tool detects memory errors, consider the following actions:
- Reseat the RAM modules securely.
- Test memory sticks individually.
- Clean dust from memory slots.
- Update your motherboard BIOS if applicable.
- Replace defective RAM modules.
Faulty memory can lead to data corruption, application crashes, and operating system instability, so addressing detected issues promptly is important.
Why Use Windows Memory Diagnostic?
Unlike third-party testing software, Windows Memory Diagnostic is built directly into the operating system and requires no additional downloads. It provides a quick and reliable way to check the health of your RAM and identify hardware problems that may be affecting your PC’s performance.
For users troubleshooting crashes, freezing, or blue screen errors, this tool is one of the most effective built-in diagnostics available in Windows.
Method 6: Review Reliability Monitor
Reliability Monitor is one of Windows’ most useful yet underutilized diagnostic tools. It provides a detailed timeline of system events, application crashes, hardware issues, driver failures, and Windows updates, allowing you to identify recurring problems that may affect your computer’s stability.
Unlike Task Manager, which focuses on real-time performance, Reliability Monitor helps you analyze your system’s long-term health and pinpoint when issues first began occurring.
Steps to Open Reliability Monitor
- Open the Start Menu.
- Type:
Reliability Monitor
- Select View Reliability History from the search results.
- Wait for Windows to load the reliability data.
What Information Does Reliability Monitor Show?
The tool records important system events and categorizes them by date, making it easier to troubleshoot recurring problems.
You can review:
- Application crashes and unexpected closures
- Windows operating system failures
- Device driver errors and failures
- Hardware-related issues
- Software installation events
- Windows Update installations
- Security and maintenance events
- System warnings and critical errors
Each event can be expanded to reveal additional details about the problem and its potential cause.
Understanding the Stability Index
At the top of Reliability Monitor, you’ll see a Stability Index score ranging from 1 to 10.
- 10 indicates excellent system stability.
- 8–9 suggests minor issues but generally healthy performance.
- Below 7 may indicate recurring errors that require investigation.
- Below 5 often points to significant stability problems.
A higher stability score generally indicates a healthier and more reliable PC.
How Reliability Monitor Helps Troubleshoot Problems
Reliability Monitor is especially useful when:
- Applications crash repeatedly
- Windows unexpectedly restarts
- Drivers fail after updates
- Hardware errors occur intermittently
- Performance issues appear after software installation
By reviewing the timeline, you can identify exactly when a problem started and correlate it with software installations, updates, or hardware changes.
Why Use Reliability Monitor?
Reliability Monitor provides a clear visual history of your computer’s health, making it easier to diagnose issues that may not be apparent during normal use. Because it tracks events over time, it is one of the best built-in Windows tools for identifying patterns, troubleshooting stability problems, and maintaining long-term system reliability.
For users who want a deeper understanding of their PC’s health, Reliability Monitor is an essential diagnostic tool that complements other Windows performance and health-check utilities.
Method 7: Check Battery Health on Laptops
For laptop users, battery health is an important part of overall PC maintenance. Over time, all rechargeable batteries experience wear, resulting in reduced capacity and shorter battery life. Monitoring your battery’s condition regularly can help you determine when performance is declining and whether a replacement may be necessary.
Windows includes a built-in battery reporting tool that generates a detailed analysis of your battery’s health, usage patterns, and estimated lifespan.
Steps to Generate a Battery Health Report
- Open Command Prompt as Administrator.
- Enter the following command:
powercfg /batteryreport
- Press Enter.
- Windows will generate a battery report and display the location where the file is saved.
Default Report Location
In most cases, the report is saved to:
C:\Users\YourUsername\battery-report.html
Replace YourUsername with your actual Windows account name if necessary.
What Information Does the Battery Report Include?
The battery report provides detailed information about your laptop battery, including:
- Battery design capacity
- Current full charge capacity
- Battery health status
- Charge cycle count
- Recent battery usage history
- Power consumption statistics
- Battery usage trends over time
- Estimated battery life
- Capacity history and degradation levels
Understanding Battery Capacity
One of the most important sections of the report compares:
- Design Capacity – The original battery capacity when the laptop was new.
- Full Charge Capacity – The maximum charge the battery can currently hold.
If the Full Charge Capacity is significantly lower than the Design Capacity, it indicates normal battery wear.
For example:
- Design Capacity: 50,000 mWh
- Full Charge Capacity: 40,000 mWh
This means the battery can only hold approximately 80% of its original capacity.
Signs of Battery Wear
You may need to consider battery replacement if you notice:
- Rapid battery drain
- Shorter runtime between charges
- Unexpected shutdowns
- Excessive heat during charging
- Significant capacity loss shown in the battery report
Why Check Battery Health Regularly?
Battery performance gradually declines with age and usage. By reviewing battery health reports periodically, you can track degradation trends, identify potential issues early, and make informed decisions about battery maintenance or replacement.
For Windows laptop users, the built-in Battery Report tool is one of the most accurate and convenient ways to evaluate battery health and ensure reliable mobile performance.
Signs Your PC May Have Health Problems
Watch for these warning signs:
- Frequent crashes
- Slow startup times
- Overheating
- Unexpected restarts
- Blue Screen of Death (BSOD)
- High disk usage
- Excessive fan noise
- Application freezes
- Battery draining quickly
If you notice several of these symptoms, perform a full health check immediately.
Tips to Improve PC Health
After checking your PC, follow these maintenance practices:
Keep Windows Updated
Install the latest security and feature updates regularly.
Free Up Storage Space
Remove:
- Temporary files
- Unused applications
- Duplicate files
Scan for Malware
Use:
- Windows Security
- Microsoft Defender
- Trusted antivirus software
Update Drivers
Keep drivers current for:
- Graphics cards
- Network adapters
- Chipsets
- Storage controllers
Clean Dust from Hardware
Dust buildup can increase temperatures and reduce performance.
Monitor Startup Programs
Disable unnecessary startup applications using Task Manager.
Common PC Health Issues and Solutions
| Problem | Possible Cause | Solution |
|---|---|---|
| Slow performance | High CPU or RAM usage | Close unnecessary applications |
| Frequent crashes | Faulty drivers | Update drivers |
| Storage warnings | Aging SSD or HDD | Back up data and replace drive |
| Overheating | Dust buildup | Clean cooling system |
| Battery degradation | Aging battery | Replace battery |
| High disk usage | Background services | Identify and disable problematic processes |
Advanced Tools for PC Health Monitoring
Power users may also use:
- Windows Performance Monitor
- Resource Monitor
- Event Viewer
- Hardware manufacturer diagnostics
- SMART monitoring software
These tools provide deeper insights into hardware and operating system health.
Conclusion
Understanding how to check PC health Windows is essential for maintaining a fast, stable, and reliable computer. Windows offers several powerful built-in tools, including Task Manager, Performance Monitor, Reliability Monitor, Memory Diagnostic, and Storage Health checks. By performing regular system health assessments and following basic maintenance practices, you can detect problems early, improve performance, and extend the lifespan of your PC.